Working at a desk for seven or eight hours a day places sustained demands on the cervical spine and the surrounding musculature. When a computer screen sits too low or too high, the human body adapts by bending the neck, thrusting the chin forward, or hiking the shoulders. Over days and months, this posture strains the suboccipital muscles, stresses the trapezius, and compresses the intervertebral discs. Many people assume neck pain stems entirely from poor chairs or bad mattresses, but the vertical position of the screen is frequently the primary mechanical cause.
Correcting screen height requires more than an arbitrary guess. It demands an understanding of your seated resting eye line, focal depth, and how the weight of the human head acts as a lever on the neck. By adjusting your display to match your specific anatomical dimensions, you reduce muscle fatigue and minimize tension headaches. This guide outlines the biomechanics of seated viewing, offers precise measurement steps, and addresses multi-display setups so you can build a stable, comfortable workspace.
Biomechanical Baselines for Desk Work
The human head weighs between 10 and 12 pounds in a neutral upright position. When the head sits directly over the rib cage and pelvis, the cervical vertebrae support this mass with minimal assistance from active muscle contraction. However, as the head tilts forward and downward to view a dropped display, gravitational torque increases dramatically. At a forward tilt of just 15 degrees, the effective load on the posterior neck muscles jumps to roughly 27 pounds. At 30 degrees, that burden climbs to approximately 40 pounds, forcing the deep cervical extensors and upper trapezius into an isometric contraction that lasts the entire workday.
This sustained contraction reduces local blood flow and leads to lactic acid accumulation, stiffness, and myofascial trigger points. Over extended periods, chronic forward head carriage can accelerate degenerative changes in the cervical spine, alter the natural lordotic curve, and pinch nerve roots exiting the spinal canal. The table below illustrates how modest changes in head inclination multiply the stress placed on your neck tissues.
| Head Tilt Angle | Effective Weight on Neck | Muscular State | Common Visual Cause |
|---|---|---|---|
| 0 degrees (Neutral) | 10 to 12 pounds | Balanced, minimal exertion | Screen top edge level with eye line |
| 15 degrees downward | 27 pounds | Mild constant contraction | Display sitting 3 to 4 inches below eyes |
| 30 degrees downward | 40 pounds | Heavy muscular fatigue | Laptop flat on desk surface |
| 45 degrees downward | 49 pounds | Severe strain and disc compression | Tablet in lap or phone on chest |
Maintaining a neutral spine requires establishing an environment where your visual gaze matches your musculoskeletal baseline. The neck should not serve as an adjustable hinge to compensate for poor hardware placement. Instead, your furniture and mounting equipment must conform to your torso and head height.
Setting Eye Level Against the Top Bezel
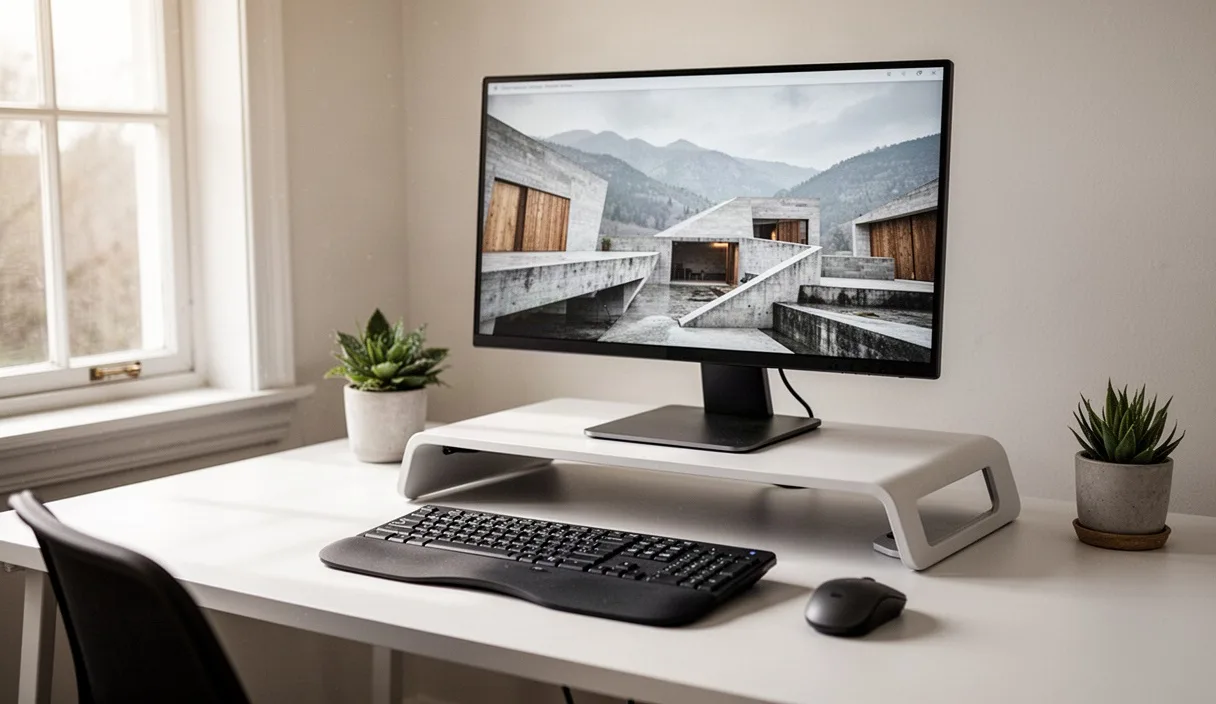
The core standard for a single monitor is straightforward: when you look straight ahead with your head in a natural, upright posture, your eyes should align with a point approximately one to two inches below the top plastic bezel of the display casing. Because natural resting eye gaze falls roughly 10 to 15 degrees downward from horizontal, this configuration ensures that the vast majority of your reading material falls within a comfortable, downward visual cone without forcing you to bend your neck.
To establish this position, sit in your working chair with your back supported and your feet flat on the floor. Close your eyes, roll your shoulders up, back, and down, and let your head balance naturally over your shoulders. Open your eyes. Your gaze should intersect the upper edge of the active screen area. If you find yourself looking at the dead center of the display, the monitor is too high, which can cause cervical hyperextension as you look up at browser tabs and menu bars. If you are looking over the top of the frame, the monitor is too low.
There are critical exceptions to this rule:
- Bifocal and progressive lens wearers: If you use multifocal glasses, aligning the top bezel to eye level will cause you to tilt your head backward to look through the bottom reading portion of the lens. You should lower the monitor by two to four inches below the standard mark so your head remains level while looking through the reading zone.
- Large displays (32 inches or greater): Extra-large monitors possess tall vertical profiles. Placing the top bezel at eye level can force the taskbar and bottom corners too low, or force your chin down to read lower windows. In these setups, position the monitor so your gaze rests at approximately the top third of the screen area.
- Upright or slightly reclined postures: If your chair is reclined to 105 degrees, your head will naturally sit slightly further back. Adjust the monitor height and tilt accordingly so the screen face remains perpendicular to your direct line of sight.
Focal Distance and Font Scaling for Eye Comfort
Physical height is only half of the ergonomic equation; distance dictates posture just as aggressively. If a screen is placed too far away, your eyes struggle to resolve text, triggering a subconscious response called the turtle neck reflex: your head slides forward horizontally off its mechanical axis to close the distance. Conversely, a screen placed too close forces the ciliary muscles in your eyes to over-accommodate, causing frontal headaches and optical fatigue.
A reliable starting baseline for focal distance is the arm reach test. Sit upright, extend your arm straight out in front of you with your knuckles curled or fingertips extended. The screen surface should sit just at the tips of your fingers, which is typically between 20 and 28 inches (50 to 70 centimeters) away. For screens 27 inches or larger, push this distance back to 30 to 34 inches to minimize rapid, wide eye sweeps that strain the extraocular muscles.
Once focal distance is locked, resolve text legibility using software scaling rather than physical repositioning:
- Set your operating system display scale so you can read standard body text from your resting position without leaning forward even a fraction of an inch. On high-resolution displays (4K or 1440p), increase the display scale to 125, 150, or 175 percent instead of leaving it at native 1:1 rendering.
- Adjust font sizes in your primary text editor, code window, or browser zoom settings to maintain a minimum character height of approximately 3.5 millimeters as viewed from your chair.
- Check display brightness and contrast. The screen should match the ambient brightness of your room. A bright white screen in a dim room creates glare that prompts you to squint and crane forward.
Dual Monitor Alignments and Primary Screen Priority
Using two displays introduces lateral rotation into the cervical spine. While downward neck flexion strains the rear extensor muscles, constant asymmetric rotation twists the sternocleidomastoid, scalenes, and facet joints. Over hours of work, this twisting creates unilateral stiffness and can irritate spinal nerves.
How you arrange two screens depends on how you divide your time between them. You must categorize your workflow into one of two patterns: primary-secondary or equal distribution.
| Workflow Model | Time Split | Screen Placement | Target Alignment |
|---|---|---|---|
| Primary-Secondary | 70/30 or 80/20 | Center the main screen directly in front of your nose; place the secondary screen directly beside it on your dominant eye side. | Angle the secondary screen inward by 20 to 30 degrees to preserve focal distance. |
| Equal Dual-Use | Around 50/50 | Center the meeting seam of the two bezels directly on your nose. | Angle both monitors inward in an arc so both are equidistant from your face. |
For most professionals, the primary-secondary layout prevents neck issues. Placing the primary monitor directly ahead ensures that you spend most of your day with your neck in dead neutral. Reserve the secondary display for reference materials, communication apps, or auxiliary documents, and turn your chair with your hips rather than twisting your neck when you need to read it for extended periods.
If you use a vertical stacked arrangement, place the primary monitor at regular eye level and angle the upper screen downward. Avoid putting frequently consulted material on the top screen, as backward neck extension combined with upward visual tracking can rapidly irritate cervical joints.
Testing Arm Rests and Desk Height Alignment
You cannot set monitor height in isolation from the rest of your workstation. If your desk or chair height is incorrect, your shoulder girdle will shift, pulling your neck out of alignment regardless of where your screen sits. When your desk is too high, you are forced to raise your shoulders toward your ears to place your hands on the keyboard, shortening the upper trapezius and levator scapulae muscles.
Begin by adjusting your chair height so your feet rest firmly on the floor with your knees bent at roughly 90 degrees and thighs parallel to the ground. Next, observe the angle of your elbows as you rest your fingers on the home row of your keyboard. Your elbows should form an angle between 90 and 105 degrees, with your forearms parallel to the floor or sloping downward slightly.
Adjust your armrests so they just graze the underside of your forearms when your shoulders are fully relaxed. They should not push your shoulders upward, nor should they allow your elbows to dangle unsupported. If your desk is too high and cannot be lowered, raise your chair until your arms sit at the appropriate angle, and place a firm footrest under your feet to support your lower limbs. Only after your lower body, torso, and arms are stabilized should you measure your resting eye level and mount your monitor arm or riser.
Five-Minute Daily Posture Reset Routine
Even with an ideal workstation setup, staying locked in a single posture creates muscular stiffness. Performing a targeted reset once or twice a day releases tension in the cervical and thoracic regions. Take five minutes to perform the following movements in order, moving slowly and smoothly without bouncing.
Cervical Retraction (Chin Tucks)
Sit upright with your shoulders dropped. Without tilting your head up or down, pull your chin straight back as if making a double chin, moving your ears over your shoulders. Hold for three seconds, feeling the stretch at the base of your skull, then release forward to neutral. Perform 10 repetitions to unload the anterior cervical spine.
Thoracic Extension over Chair Back
Slide your hips to the rear of your chair. Place your hands behind your head or across your chest. Lean backward over the top edge of your chair backrest, pivoting through your mid-back rather than your lower back. Inhale as you extend, hold for two seconds, and return to vertical on the exhale. Repeat for eight controlled cycles.
Scapular Depression and Retraction
Drop your arms to your sides. Squeeze your shoulder blades down and back toward your spine, as though tucking them into your back pockets. Hold this contraction firmly for five seconds while keeping your neck long and relaxed, then release. Complete eight repetitions to reactivate dormant middle and lower trapezius fibers.
Doorway Chest Stretch
Stand in a doorway. Place your forearms vertically against the doorframe with your elbows bent at 90 degrees. Step one foot forward through the doorway until you feel a firm, comfortable stretch across your pectorals and the front of your shoulders. Hold continuously for 30 seconds without arching your lower back, switch leading feet, and repeat on the other side.
Common Mistakes
Several frequent errors undermine an otherwise well-planned ergonomic workstation. Identifying and correcting these missteps will prevent persistent neck irritation:
- Stacking unstable items under a screen: Using loose reams of printer paper, softcover books, or unbalanced boxes to lift a display creates a tipping hazard and rarely yields the exact height needed. Use a dedicated monitor arm with gas-spring height adjustment or a rigid, solid riser.
- Working directly off an un-elevated laptop: Placing a laptop flat on a desk forces your head into an extreme 30 to 45 degree forward flexion. If you work from a laptop, mount it on a stand so its screen matches eye level, and connect an external keyboard and mouse on the desk surface.
- Extreme screen tilting: Tilting a monitor backward past 20 degrees introduces overhead lighting glare, which causes workers to hunch forward to block reflections. The screen face should generally sit near vertical, tilted backward no more than 5 to 10 degrees to match your line of sight.
- Ignoring window glare: Positioning a monitor directly in front of an unshaded window creates extreme contrast, while placing it with a window directly behind you creates wash-out glare. Orient your monitor perpendicular to windows whenever possible.
Next Steps for Your Setup
Take direct measurements of your workspace today. Grab a tape measure, sit in your usual working posture, and measure the distance from the floor to your pupils. Next, measure the distance from the floor to the top bezel of your monitor. If these numbers differ by more than two inches, adjust your monitor arm, lower your desk, or add a stable riser immediately.
If you implement these ergonomic adjustments and continue to experience radiating pain, numbness, tingling in your fingers, or severe muscle spasms, do not attempt to self-treat through furniture adjustments alone. These symptoms may point to cervical radiculopathy, disc herniations, or other clinical conditions that require formal assessment by a licensed physical therapist, orthopedist, or occupational health specialist. Use proper hardware alignment as a protective baseline, listen to your body, and adjust your workspace as your physical needs evolve.